Apple Pay + Crypto Cards: The Setup
Adding a crypto card to Apple Pay is simpler than most people think. You don’t need to understand blockchain, run a validator, or manage private keys — just open your iPhone’s Wallet app, add your card details (identical to loading a traditional debit card), and you’re ready to spend. This guide walks through the exact process for ether.fi Cash, then compares comparable steps for Crypto.com and Coinbase cards so you can decide which fits your workflow.
Key metric: Total setup time from opening Wallet to paying is under 3 minutes for ether.fi.
Prerequisites: What You Need Before Adding to Apple Pay
To add your ether.fi Cash card to Apple Pay, you’ll need three things. First, an active ether.fi account — [sign up here](https://www.ether.fi/@defycard) if you haven’t already. Second, the virtual card must be issued and activated in the ether.fi app. Third, your iPhone, iPad, or Apple Watch running iOS 12.1 or later.
If you’re waiting for your physical card, no problem — the virtual card alone works everywhere Apple Pay is accepted online and in-store, with no delay.
Signal: The virtual card is your fastest path to spending. Physical card arrival takes 15+ business days depending on tier and region, but you don’t need to wait. Start earning cashback immediately with the virtual card on Apple Pay.
How to Add ether.fi to Apple Pay: Step-by-Step
Step 1: Open Apple Wallet and Tap “Add Card”
On your iPhone or iPad, open the Wallet app (typically on your home screen). Tap the ”+” icon in the top-right corner. If you don’t see it, tap “Add a Card” at the bottom.
You’ll be prompted to choose a card type. Select “Credit or Debit Card.” Next, choose “Use Camera” (if you have your physical card) or “Enter Card Details Manually” (faster for virtual cards).
For the virtual card, use manual entry. Open your ether.fi app, navigate to “Card” → “View Details,” and have your card number, expiry, and CVV ready.
Key metric: Manual entry takes 60–90 seconds. Camera scanning takes 120–150 seconds.
Step 2: Enter Your Card Number, Expiry, and CVV
In Apple Wallet, you’ll see four input fields:
Card number (16 digits) — copy directly from ether.fi’s card details screen. Expiry date (MM/YY) — ether.fi cards typically expire every 4 years; verify in your app. CVV (3 digits) — the security code in your virtual card details. Cardholder name — use the exact name registered on your ether.fi account (spelling must match, case-insensitive).
Apple Wallet auto-detects this as a Visa card; don’t change it.
Why it matters: A name mismatch between Wallet and your ether.fi account can block online transactions where the card network verifies the cardholder name. Double-check spelling before tapping “Next.”
Step 3: Verify Your Card and Set Default
Apple will ask you to confirm your billing address and ZIP code. This mirrors standard Visa verification — no extra ether.fi auth needed.
Once verified (10–30 seconds), your card appears in Wallet. Tap it and you’ll see “Set as Default” (for Apple Pay to offer ether.fi first when you pay) and “Show on Lock Screen” (for quick access).
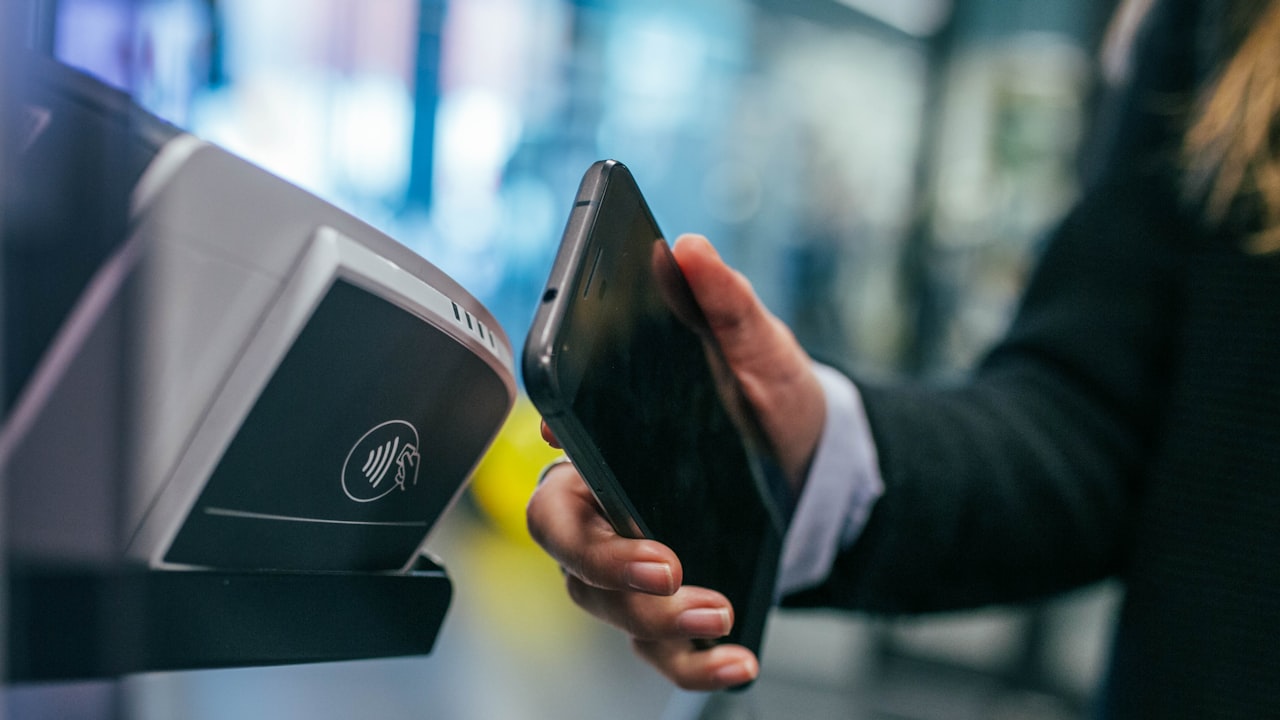
Verification and Your First Transaction
After adding your card, you can use it immediately at any NFC terminal that accepts Apple Pay. To pay:
Double-click the side button (iPhone X+) or Home button (older models). Look at your iPhone (Face ID) or place your finger on Touch ID. Hold your phone near the NFC terminal until you feel a vibration + “Done” message.
Your first transaction often takes 30–60 seconds at the terminal (longer than a regular card) because Apple Pay is verifying your ether.fi balance in the background. Subsequent transactions are faster (10–15 seconds).
Risk: Some transactions show “pending” instead of confirmed immediately. If you see pending, check the ether.fi app directly — the funds may have already moved. Apple Pay doesn’t always wait for ether.fi backend confirmation before marking the transaction complete. Monitor your app for 24–48 hours. If it doesn’t clear, contact ether.fi support.
Troubleshooting: Why Your ether.fi Card Won’t Add to Apple Pay
Apple Wallet Rejects Your Card Number
If Apple Wallet says “Card Not Supported” or “Unable to Add Card,” the most common reason is the virtual card hasn’t been fully activated in the ether.fi app. Go back and check:
Tap “Card” → “Card Status” and confirm it shows Active (not “Issued,” “Pending,” or “Suspended”). If status is “Issued”, wait 5–10 minutes and refresh the app. The backend sometimes lags. If status is “Suspended”, check your ether.fi account for a security alert. You may need to verify your identity.
Second reason: you’re using an old/expired virtual card number. If you replaced your card (lost, compromised, or tier upgrade), the old number won’t work. Delete the old card from Wallet and add the new number.
Why it matters: Apple Wallet checks the first 6 digits of your card (the BIN) against Visa’s issuer list. ether.fi’s BIN may not be whitelisted on very old iOS versions (<15.1). Update to the latest iOS if needed.
Card Adds Successfully But Transactions Fail
Your card is in Wallet, but the terminal declines:
Scenario 1: Monthly tier limit exceeded. ether.fi enforces monthly spending caps: Core ($2,000/mo), Luxe ($10,000/mo), Pinnacle ($50,000/mo). Once you hit your limit, all transactions are blocked for the rest of that calendar month.
Check your ether.fi app: “Account” → “Tier Status” → “Remaining Limit.” If it’s $0, wait until the first day of next month or upgrade your tier.
Scenario 2: Insufficient card balance. Your ether.fi balance is separate from your bank account. The card balance (in USD or EUR equivalent) must have funds to spend.
Check “Available Balance” in the ether.fi app. If it’s near $0, deposit more ETH and wait 24–48 hours for it to settle.
Risk: This is the #1 cause of embarrassing declines at checkout. Verify your balance before heading to the store, especially for large purchases.
How ether.fi, Crypto.com, and Coinbase Differ on Apple Pay
All three cards add to Apple Pay using the same core flow, but the underlying experience differs significantly. Understanding these differences helps you choose the right card for your spending style.
ether.fi vs. Crypto.com Card
Both take 2–3 minutes to add to Wallet. The critical difference: staking requirements and cashback tiers.
Crypto.com requires you to lock CRO tokens in the Earn program to unlock cashback rates. Ruby Red ($3k CRO locked) gives 2% cashback; Jade ($10k CRO) gives 3%; higher tiers give 3.5%+. Your CRO is locked and earning yield in Crypto.com’s ecosystem, but unavailable elsewhere.
ether.fi takes a different approach: your ETH stays staked on the ether.fi protocol while your card draws from that balance for spending. No secondary locking required. You earn 3–5% staking yield on your ETH while also getting up to 3% cashback on spending. The two rewards stack.
Signal: If you want “earn while spending without locking extra collateral,” ether.fi wins. If you want higher cashback rate tiers and don’t mind locking CRO, Crypto.com offers broader category rewards (up to 5% on select merchants).
ether.fi vs. Coinbase Card
Coinbase Card is issued by Luno and works with Apple Pay, but adds an extra identity verification step: Coinbase re-verifies your ID before the card can be added to Wallet (30–60 minutes). This is an extra compliance gate that ether.fi and Crypto.com don’t require.
Coinbase Card doesn’t offer cashback. Instead, you get 1.50% reward in USDC on all spend. It’s a flat rate — no tiers, no promos.
ether.fi’s up-to-3% base cashback (plus 15% promo on food/dining) is a significantly stronger deal if you spend regularly. You’re also not locked into a centralized exchange; ether.fi is more crypto-native (self-custody).
Alternative: If simplicity is your priority and you don’t care about rewards, Coinbase Card is the fastest path. But for yield-while-spending and higher cashback, ether.fi + Apple Pay is the strongest combination.
What to Watch
- NFC transaction limits by region: Some countries enforce daily and per-transaction limits on contactless payments (e.g., $50–$100 per tap in some US regions). If the terminal declines, ask the merchant to run it as online/keyed or use a different payment method. Card networks refresh limits daily at midnight in your timezone.
- Virtual card reissue: If your virtual card number changes (fraud block, expiry refresh, or tier upgrade), delete the old card from Wallet and re-add the new number. Old card transactions fail 24 hours after reissue.
- Offline transaction processing: Apple Pay can process transactions via NFC even with no internet; the token is cached locally. Verify completion in the ether.fi app within 24 hours; if missing, the terminal may retry or you may need to re-enter at a different terminal.
- Account closure side effects: If you close your ether.fi account, your card stops working globally. Any pending Wallet transactions fail. Disable the card from Wallet first to avoid surprise declines.
- Fee and FX rate updates: ether.fi may adjust FX rates, add regional fees, or refund ATM charges. Check ether.fi’s help center for the latest fee structure before large international purchases.
Bottom Line
- Adding ether.fi to Apple Pay takes under 3 minutes — open Wallet, enter your card details, verify your address, and you’re ready to spend.
- Your virtual card works immediately — no waiting for the physical card. Start earning cashback on your first NFC transaction.
- Crypto.com requires CRO staking for higher cashback rates; ether.fi’s staking stays active while you spend (simpler for yield-while-spending).
- If you fit the “yield while spending” profile — earning cashback on staked ETH without locking extra tokens — ether.fi’s Apple Pay combo is your strongest play. [Sign up here](https://www.ether.fi/@defycard).
FAQ
Q: Do I need a physical ether.fi card to use Apple Pay? A: No. Your virtual card works on Apple Pay immediately after activation. You can use it online and in-store (NFC) before your physical card arrives.
Q: Can I add ether.fi to Google Pay or Samsung Pay instead? A: Yes. ether.fi supports Apple Pay, Google Pay, and Samsung Pay. The steps are nearly identical — open the respective wallet app, tap add card, and enter your Visa details. This guide focuses on Apple Pay, but the process is the same for all three.
Q: What if Apple Pay says “Card Not Supported”? A: This usually means your virtual card isn’t fully activated in the ether.fi app, or you’re on an iOS version older than 12.1. Update to the latest iOS and confirm the card status shows “Active” in ether.fi’s app.
Q: Can I use Apple Pay for ATM withdrawals with ether.fi? A: No. Apple Pay works at NFC terminals and online. ATM withdrawals require the physical card or a separate debit withdrawal. There’s a 2% ATM fee per ether.fi’s pricing.
Q: How do I remove ether.fi from Apple Pay? A: Open Wallet, long-press the ether.fi card, tap the ”…” menu, and select “Remove Card.” This doesn’t delete your ether.fi account — only removes it from Apple Pay.
Q: Is there a spending limit after adding to Apple Pay? A: Your ether.fi tier sets your monthly limit (Core: $2,000/mo, Luxe: $10,000/mo, Pinnacle: $50,000/mo). Apple Pay transactions count toward this limit. Individual transaction limits are set by your card issuer (typically $500–$1,000 per tap depending on region and merchant).
Risk + Disclosure
DefyCard publishes affiliate-linked reviews; we may earn a commission when you sign up through our links. ether.fi is a non-custodial card and staking protocol — your ETH is held in a smart contract, not by ether.fi directly. Crypto assets are volatile. If the ETH price drops 50% tomorrow, your card balance will reflect that loss. Apple Pay provides tokenization security, but the underlying crypto asset carries risk. Always verify ether.fi’s up-to-date country availability before opening an account — the card is not available in all regions (see ether.fi’s help center for the current list of supported countries and US states).